Welcome To My Photography Blog!

Hope you enjoy the photos, post comments (even if you're not a registered blog user) dont forget to check back for new posts!

Visit my facebook page by clicking the Facebook logo on the top right corner!

Wednesday, September 30, 2009

Genting Highlands

Here's some photos from Genting Highlands. Its a great place to go to, but be warned, food ain't the cheapest thing there. ;p But im sure if you do plan to go there, you are prepared to burn some cash :)

The place is enormous, Its quite easy for first timers to get lost around there. The theme park looks amazing, and there's so many things that you can do there. If you are planning to travel around Malaysia and you haven't been here, then it should be on your checklist. :)

Monday, September 28, 2009

Crazy about Colors

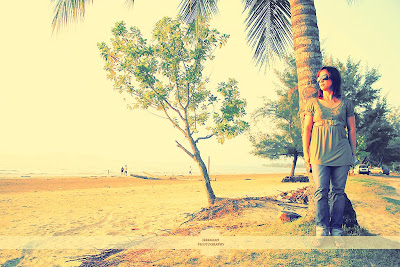
I'm gettin pretty crazy about editing the colors in my photos. My work flow in Photoshop keeps changing just to get it right :) This is a picture of my mum taken last year in Tanjung Aru Beach.

Its not the easiest thing getting the colors to work for the mood in the photograph. There's lots of things that you have to do in photoshop. :) Luckily, im prepared to spend hours to get it right. Learning Photoshop on your own is pretty hard.

There's no online tutorial for this sort of thing, its like those photographer's secrets that they keep under lock and key. I guess it helps to keep their style as unique as possible, but because there's more than one way to do anything in Photoshop, everyone can have their own unique way of editing colors.

Friday, September 25, 2009

Transparency

These are the pictures from the photo shoot for Olivia, Affiq, and Wendy. There were actually more pictures that I would have loved to edit but these are the ones that came out the best.

Before the shoot I promised myself to do the shoot under natural light without any help from reflectors because I remembered thats how I love to shoot photos.

The photo shoot was done in the park that was recently built in Likas Bay. The main theme for it was, just as the post title suggests, Transparent. The Items that were modeled had to be transparent.

Ikhwan, Bernard, my sister Cheryl, and Joanna (who lent me her new DSLR for this shoot) were also at the shoot. It was quite hazy when we arrived. It wasn't long after we started the shoot that we began to really feel the heat of the sun.

We wrapped up the shoot before 11am. We were so lucky we decided to go in the morning because at 12 noon, It rained pretty heavily. ;p It was pretty fun altogether, but lying on the grass gave rashes to some of us. haha

Made a new watermark too :p not sure if it looks good tho...

Thursday, September 24, 2009

I see a Fisheye

First of all, I would like to register that this week has been one of the most boring weeks of my life. I have absolutely nothing to do. Well, a couple of assignments but even the questions to do the assignments are written wrongly, so theres no point in continuing until I get a corrected version.

Apart from that, Im going to have my very first photo shoot tomorrow (as in like, a hired shoot) so im pretty excited at the moment. Gotta be on my game ;)

The Picture above was taken with the Nikon D200 with a Nikon 10.5mm f/2.8 DX Fisheye Lens.

Heres a short definition of a fisheye lens from wikipedia:

In photography, a fisheye lens is a wide-angle lens that takes in an extremely wide, hemispherical image. Originally developed for use in meteorology to study cloud formation and called "whole-sky lenses", fisheye lenses quickly became popular in general photography for their unique, distorted appearance. They are often used by photographers shooting broad landscapes to suggest the curve of the Earth. Hemispherical Photography is used for various scientific purposes to study plant canopy geometry and to calculate near-ground Solar Radiation.

Monday, September 21, 2009

Color Treatments

I've been browsing around photography websites,blogs, and flickr displaying photos of weddings or portraits and the one thing that I cant fully understand is how professionals do color treatments to give their photos a special kind of color to add mood to the scene. Its the kind of thing that I like to add to my photos.

I have my own way of creating it but I cant seem to get it perfect for other types of scenes. Maybe someday I'll figure it out.

I took this self-portrait last year with the Canon EOS 1000D. The light was from a window, taken at around 9am.

Friday, September 18, 2009

Lok Kawi Wildlife Park

It feels like ages since I took these pictures in October 2008. I had joined the SPCA [Society for the Prevention of Cruelty To Animals] on a trip to Lok Kawi Wildlife Park. It was fun, we got to see lots of animals and I got to take lots of pictures. :)

Wednesday, September 16, 2009

Side-Lighting


This photo of my neighbor, Bernard, was taken in my studio study room. yeah... study room. We had nothing better to do, we took a fluorescent tube and propped it up on the table, turned off the other distracting lights, and we got a sort of side-lighting effect.

The only downfall to doing this is that, the catchlights in the eyes appear to be a thin, curved line. Not sure if people will find this type of catchlight very attractive, but yeah, it did achieve a slight studio look. :p

Usual catchlights in studio set ups look like rectangles or squares if they use soft boxes, or even round if they use shoot-through umbrellas, ring flashes or beauty dishes[you can look that up in google].

Note: I used the Nikon Coolpix S210 to take this photo :p

I was so bored I even made the diagram of how it was done. I used a PSD file provided by Kevin Kertz to create it.


Monday, September 14, 2009

Varying Hues

I snapped this during the outing at Sutera Magellan. It caught my attention because it was so colorful. It was quite difficult to use the Nikon Coolpix s210 in this situation because the area was shaded and I had to take many photos just to get a clear shot of this.

I also added the Agfa Optima filter onto this photo. I don't know why but I seem to be obsessed with that effect lately. Although it doesn't really work with all types of photo scenes, I get excited when it does.

Gah... I keep finding my self thinking of Christmas lately [yeah I know, its quite a long time to go] Its quite funny really, when I think about it because its Hari Raya soon and im already thinking about Christmas.

Everywhere I go, something seems to remind me of it. Yesterday, in a pet shop of all places, I saw a dog bowl with a bone with a red line spiraling around it like a candy cane. This is the first time in a few years that im actually really looking forward to it. Not sure why, but I just cant wait for it :p

Friday, September 11, 2009

Simulating Color Film In Adobe Photoshop

These are somewhat the left over photos from the Shoot in Sutera Magellan. They were cross processed with the Agfa® Optima filter from the Alien Skin: Exposure Plug-In for Adobe Photoshop. This is a Plug-in that gives digital photographs the look and feel of film.

I have used this filter on occasion but only very slightly. In these photos, I decided to give them the complete film look. Im not sure if I got it totally right, but it looks like film to me :p I think I should play around with this Plug-In more because it also allows you to customise your signature look and save it as a one-click effect.

Wednesday, September 9, 2009

Sunset Time Lapse [Sutera Harbour Magellan]


This is my first time really trying out time lapse videos. There are a few more ideas that I have in mind, but then that's for future posts :p

Time-lapse photography is a cinematography technique whereby each image frame is captured at a rate much slower than it will be played back. When replayed at normal speed, time appears to be moving faster and thus lapsing. Time-lapse photography can be considered to be the opposite of high speed photography.

Processes that would normally appear subtle to the human eye, such as the motion of the sun and stars in the sky, become very pronounced. Time-lapse is the extreme version of the cinematography technique of undercranking, and can be confused with stop-motion animation.

This time lapse duration was around over an hour. Settings were set to one photo every 30 seconds. Video was slowed down so that it could last longer :) Next time I will try to make longer time lapse videos :)

Music: This is the Future - Owl City

Monday, September 7, 2009

Sutera Harbour Take 2

These are the photos from the first outing of the Unitar Photography Club (UPC) at Sutera Harbour Magellan. Big thanks to all those who turned up to make the outing a success.

These photos were taken with the Nikon Coolpix S210.

The outing started at 4.15pm till sunset. We showed the members how to use reflectors to brighten up subjects with bright backlights. Midway through the shoot, I set up the camera to take a time lapse video of the sunset.

I will upload the video on the next post.

Models: Vivian and Nadine

Thursday, September 3, 2009

Heineken

I took this picture last year. I hadn't really put much thought into the composition because...well... I didn't know much about it at the time. It was one of the first few HDR pictures that I tried to take [with the Canon EOS 1000D].

I never did get around to edit it properly until now. Three exposures taken with AV mode set at -2 EV,0 EV,+2 EV respectively. I processed the HDR in photomatix, then applied tone-mapping through photoshop.

You'd think that was all I had to do...

It was hard work and layer by layer it continued to pile on. It took around an hour to finally get the photo to look like the way I had imagined it in my mind, and I just realised I had an assignment that I could have easily finished a few hours ago xD.